將chrome瀏覽器與新北市學生電子郵件帳戶連結
新北市學生皆擁有一個google帳號,google的電子郵件為~校務行政系統帳號@apps.ntpc.edu.tw
例如:sjps101076@apps.ntpc.edu.tw
可使用這個google電子郵件來登入chrome瀏覽器,登入後就可以讓您使用手機、平板、PC或NB等裝置擁有相同的書籤等內容(同步化)。


實踐國小30周年校慶倒數計時
實踐國小30周年校慶(107/04/21)倒數計時
分別在實踐國小官網 http://www.sjps.ntpc.edu.tw

與實踐國小30周年校慶網 http://mte.sjps.ntpc.edu.tw/sjps30/

加上倒數計時
wordpress 倒數計時外掛下載位址
七期電腦安裝多作業系統(三系統)-506電腦教室30台電腦
七期電腦安裝多作業系統(三系統)
506電腦教室30台電腦全部安裝完成
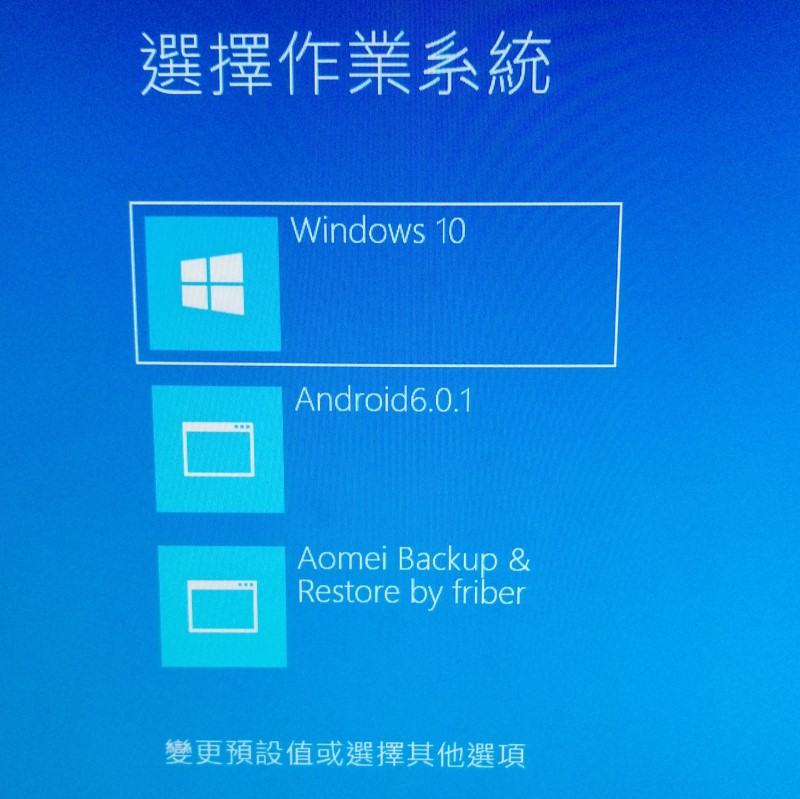
學生開機後有3個選擇:
預設系統為 windows 10
第2個系統是 Android6.0.1
第3個系統是 Aomei
Remix_OS_for_PC_Android
Remix_OS_for_PC_Android
https://sourceforge.net/projects/remix-os/postdownload?source=dlp
讓PC也可以安裝Android系統~使用Remix OS for PC
七期 電腦windows10 與 android 系統共存 雙系統

How to launch Remix OS for PC
-For Hard Disk Installation:
NOTE: Currently, installation tool only supports Windows 7, Windows 8 or Windows 10, with a minimum capacity of 8GB. Other system users, please install on USB flash drive.
1. Download the Remix OS for PC package, which contains the Remix OS for PC ROM & Installation Tool.
2. Open the Remix OS Installation Tool and follow the instructions to install Remix OS for PC on your hard disk.
3. Reboot your PC.
For UEFI, press special key (F12 for Dell, F9 for HP, F12 for Lenovo, Option Key for MAC) while booting to enter boot menu and ensure that Secure Boot is disabled.
4. Select Remix OS in Windows Boot Menu.
-For USB Flash Drive Installation:
NOTE: A USB 3.0 flash drive that supports FAT32 format, with a minimum capacity of 8GB and a recommended writing speed of 20MB/s.
1. All data on your USB flash drive will be erased. Please backup the data in your USB flash drive before you start the installation.
2. Download the Remix OS for PC package, which contains the Remix OS for PC ROM & Installation Tool
3. Insert USB flash drive into your PC
4. Open the Remix OS Installation Tool and follow the instructions to install Remix OS for PC on your USB flash drive.
5. Reboot your PC.
6. Press special key(F12 for Dell, F9 for HP, F12 for Lenovo, Option Key for MAC) while booting and enter Boot Menu.
For UEFI, ensure that Secure Boot is disabled.
7. Select USB Storage Device under boot option.
8. Select either Guest Mode or Resident Mode to start Remix OS.

friber教學小工具~中年級基礎鍵盤輸入
這兩天代課3年級資訊課,順手寫了兩個打字程式。
請注意,此程式執行後,畫面顯示的英文字母含數字等必須完全正確才能關閉。
如果沒有一定基本鍵盤輸入(大小英文、數字特殊符號)能力,請勿執行。
程式執行橫會占滿整個螢幕畫面,必須輸入正確的內容後,才能關閉。想強制練習鍵盤輸入者,可以試試。

======================
以下是初級版

下載friber教學小工具~中年級基礎鍵盤輸入(打字練習)初級版
輸入正確,通過畫面:
輸入第一個字後才會開始計時。
chrome 瀏覽器畫面變黑處理方式
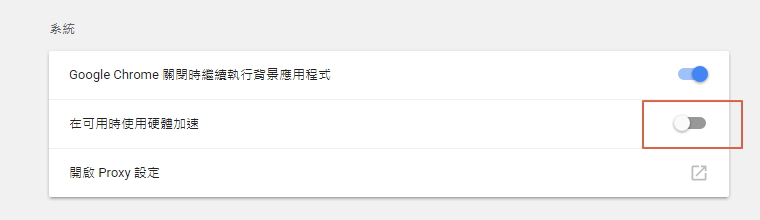
chrome 瀏覽器畫面變黑處理方式
設定-進階-系統-在可用時使用硬體加速-選擇關閉

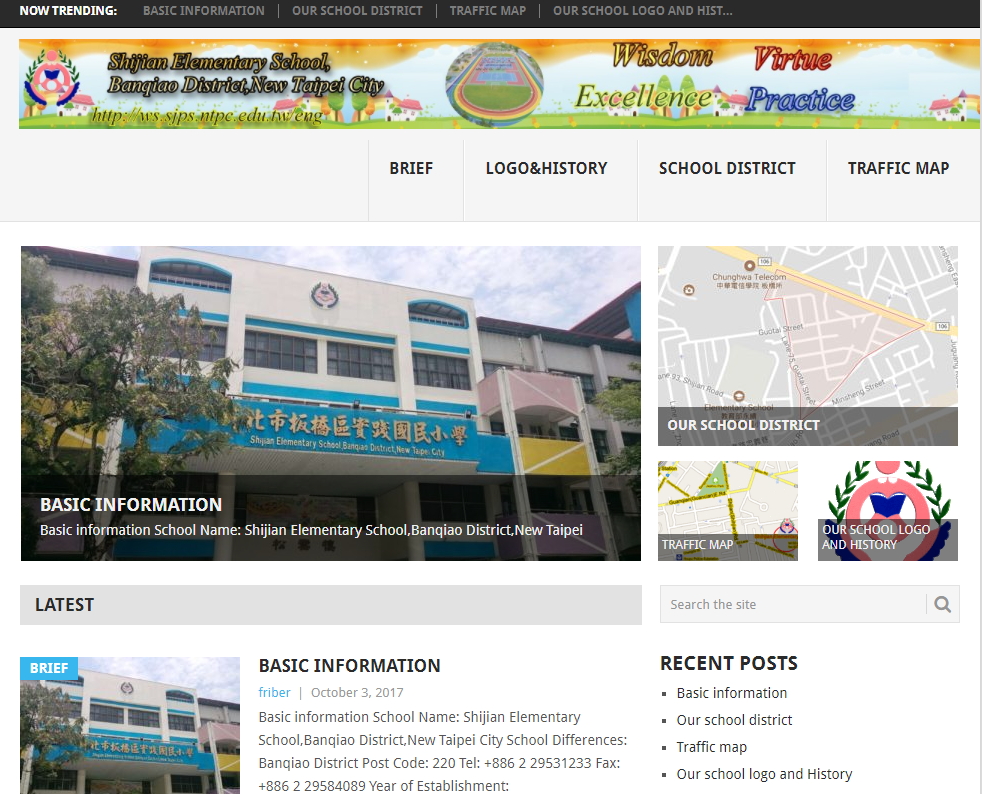
新北市實踐國小英文網站
剛剛建置了新北市實踐國小英文網站,網址:http://ws.sjps.ntpc.edu.tw/eng
Windows Server 停用 DNS 伺服器上的遞迴功能
Windows Server 停用 DNS 伺服器上的遞迴功能
https://technet.microsoft.com/zh-tw/library/cc771738(v=ws.11).aspx
使用 Windows 介面停用 DNS 伺服器上的遞迴功能
開啟 [DNS 管理員]。
在主控台樹狀目錄的適當 DNS 伺服器上按一下滑鼠右鍵,然後按一下 [內容]。
位置
DNS/適用的 DNS 伺服器
按一下 [進階] 索引標籤。
在 [伺服器選項]中,選取 [停用遞迴] 核取方塊,然後按一下 [確定]。
用iTALC 3.0.2+Toolwiz Time Freeze2017+friber檔案派送程式管理電腦教室
用iTALC 3.0.2+Toolwiz Time Freeze2017+friber檔案派送程式管理電腦教室
電腦教室學生端安裝即時還原軟體Toolwiz Time Freeze2017,設定每次還原。
要變更學生端作業系統設定或更新軟體時,用iTALC 3.0.2遠端開機,遠端控制學生電腦,先解除即時還原保護。
解除系統保護後,再以自製的friber檔案派送程式,發送檔案給全體學生端電腦,達到電腦教室所有電腦變更作業系統設定的目的。
發送的檔案除了可以指定要存放的路徑,friber檔案派送還有一個特別加入的功能,就是如果傳的是執行檔,傳送後會自動執行。
如此就可以將變更設定寫成.exe執行檔,再傳送給學生端,送完後,學生作業系統設定等也同時做了變更,30台電腦全部完成設定,時間只要1秒。
全部完成設定後再以iTALC 3.0.2遠端控制學生電腦,設定即時保護即可。
全部過程最花時間的就是等候學生電腦重新開機,與一台一台解除Toolwiz Time Freeze2017即時保護,可惜Toolwiz Time Freeze找不到下命令方式解除保護,不然用friber派送執行檔案的方式來解除保護不就省事多了。
剛剛又寫了新的開機自動連線程式,並將30台學生電腦全部更新,全部學生開機畫面如下:

新的開機連線程式畫面:

主要是加上鍵盤提示,因四年級學生剛從三年級升上來,加上windows 10預設輸入為中文,部分學生不知如何切換為英文輸入。不少學生會用滑鼠點右下角的[中]來切換,但因連線程式視窗是全螢幕且置頂的,無法顯示工作列,所以只會用滑鼠切換輸入法的學生就卡住了。
剛剛寫好新開機連線程式(有鍵盤輸入提示),當然必須再來一次[解除-派送檔案-保護]的電腦教室管理工作。
遠端控制學生端電腦的實作過程,iTALC 3.0.2不知為何每隔10幾秒就會當掉,必須關閉回應後再開,有點困擾。30台全部變更完成,全部時間大約30分鐘,其中不少時間是再重新開啟iTALC管理介面 。幾乎是改一台學生端電腦,就得重開iTALC管理介面一次。
